7
Place the lower holder
on the lower bolts. Tip
the partition slightly to
do so.
239
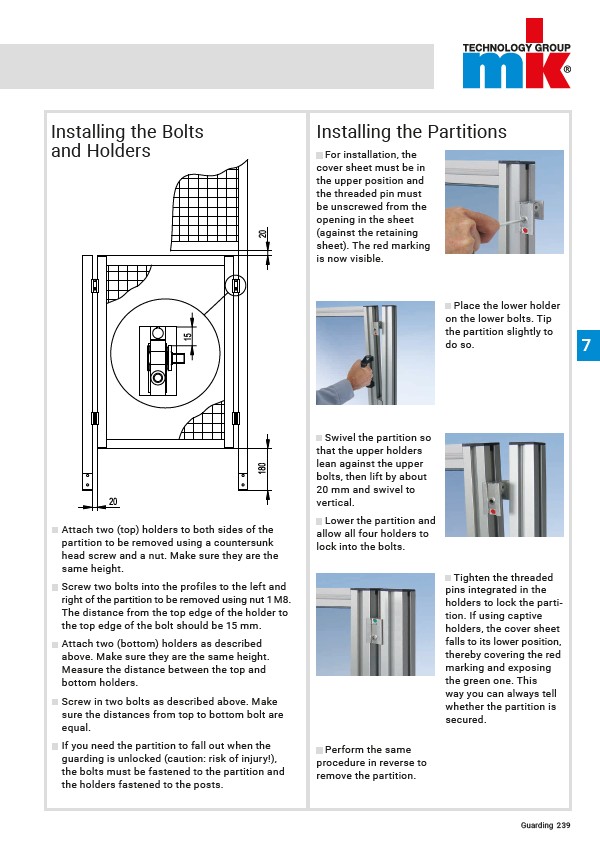
Installing the Bolts
and Holders
Installing the Partitions
Attach two (top) holders to both sides of the
partition to be removed using a countersunk
head screw and a nut. Make sure they are the
same height.
Screw two bolts into the profiles to the left and
right of the partition to be removed using nut 1 M8.
The distance from the top edge of the holder to
the top edge of the bolt should be 15 mm.
Attach two (bottom) holders as described
above. Make sure they are the same height.
Measure the distance between the top and
bottom holders.
Screw in two bolts as described above. Make
sure the distances from top to bottom bolt are
equal.
If you need the partition to fall out when the
guarding is unlocked (caution: risk of injury!),
the bolts must be fastened to the partition and
the holders fastened to the posts.
For installation, the
cover sheet must be in
the upper position and
the threaded pin must
be unscrewed from the
opening in the sheet
(against the retaining
sheet). The red marking
is now visible.
Guarding
Swivel the partition so
that the upper holders
lean against the upper
bolts, then lift by about
20 mm and swivel to
vertical.
Lower the partition and
allow all four holders to
lock into the bolts.
Tighten the threaded
pins integrated in the
holders to lock the partition.
If using captive
holders, the cover sheet
falls to its lower position,
thereby covering the red
marking and exposing
the green one. This
way you can always tell
whether the partition is
secured.
Perform the same
procedure in reverse to
remove the partition.